Source: II.studio/Shutterstock.com
There are lots of reasons why you might want to make t-shirts at home. Maybe you want to create one-of-a-kind styles to wear yourself, or maybe you’d like to make your child customized apparel for various holidays. You might even be thinking about customizing shirts for a group, organization or team. You could even be considering some ways to earn some extra cash on the side. Whatever the case may be, if you have a Cricut, some plain t-shirts in bulk and a bit of creativity, you have (almost) everything you need to start making t-shirts at home. Keep reading to learn how to make t-shirts with Cricut!
Gather Your Supplies
Before we dive into the process for making a custom tee, let’s make sure you have all of the necessary supplies. For this project, we’ll be making iron-on vinyl designs. The supplies you’ll need are:
Order Plain T-Shirts in Bulk to Start Making T-Shirts with Cricut
- A cotton shirt (Any color works. If you’d like your final product to be totally unique, though, consider learning how to tie-dye with bleach.)
- Heat transfer vinyl (also known as iron-on vinyl)
- A Cricut machine, cutting mat and Cricut Design Space software
- Weeding tools
- An iron or heat press
- A design (more on that in the next step!)
Once you have everything you need, it’s time to get started!
Choose or Create a Design
Open up your Cricut Design Space software. Once it loads, click on “New Project” and then choose “Templates” in the upper left corner. Select the “Classic T-Shirt” template and then choose the appropriate options for style, size and color. Whether you’re working with adult or kids’ plain t-shirts, using this template ensures the size of your design will be just right.
From there, start browsing for a design. Click on “Images” and then scroll through the image library until you find something you like. As a beginner, it’s best to choose a simple design that doesn’t have a lot of detail. If you have some experience working with vinyl and are comfortable with weeding intricate designs, feel free to choose something more complex or create your own design from scratch.
Once you’ve chosen your design, it will display on your shirt template. If necessary, resize the design to fit the shirt properly using the resize handle which is located in the bottom right corner. Click on the handle and drag to resize the image.
Cut Out Your Design
When everything looks good, click on the green “Make It” button. Then, on the left side of your screen, toggle the “Mirror” option. When cutting heat transfer vinyl, images always need to be mirrored.
Order Kids’ Plain T-Shirts and Save!
Place your heat transfer vinyl on the cutting mat with the shiny side facing down. This is extremely important. Then, load the cutting mat into your machine, choose the appropriate settings and cut out the design.
Source: Dreamers Lil Dream Shoppe/Shutterstock.com
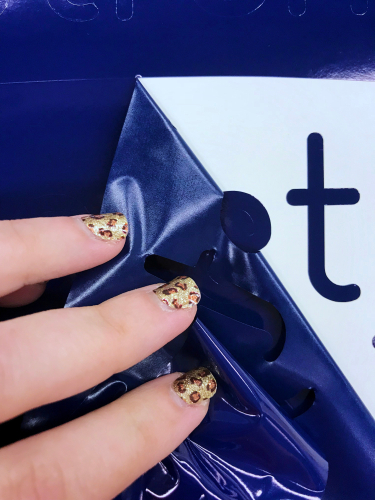
When it’s finished cutting, it’s time to weed, which is simply the process of removing all of the excess vinyl you don’t want transferred to your t-shirt. Start by peeling away the vinyl from the edge. Take your time to avoid peeling up any vinyl you do want to transfer to your shirt. Use weeding tools to remove all of the extra little bits and pieces. Be patient and take as much time as necessary to fully weed the design. If you chose a simple image, this shouldn’t take long.
Transfer the Design to Your Shirt
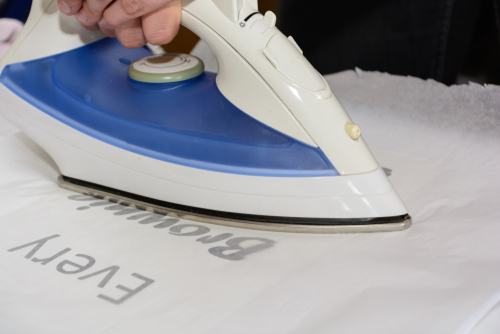
Preheat your iron or heat press to the cotton setting. While it’s warming up, place the image on your shirt, taking care to ensure it’s positioned properly. If you are centering it on the front of the shirt, you can find the center by folding the shirt in half and matching up the sleeves. Use your iron or heat press to make a slight crease on the fold. Open the shirt up and line the center of your design up with the crease.
Source: Bildagentur Zoonar GmbH/Shutterstock.com
Once you are satisfied with the image placement, apply medium pressure with your iron or heat press. Check the directions that came with your heat transfer vinyl and/or your heat press for full instructions regarding how long to apply heat.
Wait a few moments for the design to cool down to a warm temperature and then carefully pull the carrier sheet off the image. If the design starts to peel up, replace the carrier sheet and press again.
Conclusion
With Cricut, designing custom apparel is easy. Follow the steps listed above and you’ll be on your way to creating unique shirts to wear, dress your family in, give as gifts or even sell. If you’re interested in learning even more about the humble t-shirt, check out this study on the effect of two kinds of t-shirts on physiological and psychological thermal responses.


