When it comes to expressing yourself, creating custom t-shirts is one of the best (and simplest) options. Whether you have beautiful artwork, a special photograph or any other type of design that you’d like to showcase, printing it on a t-shirt is a great option. Making your own shirts also works well when you need custom apparel for a team, group or organization.
Having shirts professionally printed can be a costly endeavor. This is especially true when you only need to have a small number of shirts made and are unable to take advantage of the quantity discounts offered by most printers.
The good news?
Printing t-shirts at home is affordable and easier than you may think. There are a few different ways to get the job done, and there are a number of steps that must be taken in order to ensure that the finished product turns out as you hope it will. With a bit of patience and a positive do-it-yourself attitude, though, anyone can design and customize tees (and other apparel!) at home at a fraction of the cost of having them professionally printed. In this post, we will be diving into how to print custom t-shirts using iron-on transfer paper. Let’s go!
Before You Get Started…
Before we dive into the process of printing your own t-shirts, we would like to go over a few important considerations. For starters, you need to make sure to choose shirts that are right for the project. Not all tees are created equally, and some don’t work as well for printing as others.
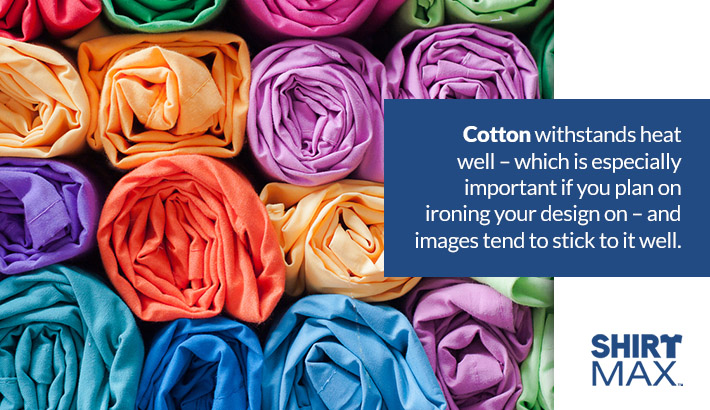
When you’re shopping for blank t-shirts, cotton is usually the best fabric option. It withstands heat well–which is especially important if you plan on ironing your design on–and images tend to stick to it well. Consider quality, too. If you want to create shirts that will withstand the test of time, look for trusted brands like Hanes, Fruit of the Loom, Jerzees, etc. Buying blank apparel from well-known brands means that you can rest assured knowing that they will be of the highest quality and won’t fall apart on the first wash. Doing so also means buying from companies that are dedicated to social and environmental responsibility.
If you are printing a dark design, a light-colored shirt is your best bet. Lighter designs “pop” more on darker shirts. Keep in mind, though, that if you are printing on darker shirts, you may need to invest in special materials, such as iron-on transfer paper that’s designed for dark fabric, which may be more expensive than the materials used for printing on lighter fabrics.

Be sure to gather all your supplies prior to getting started. Having everything on hand makes it much easier to see the project through from start to finish. Read all of the instructions carefully before you get started to ensure you understand everything and have the materials you need. Consider investing in some extra supplies just in case your first attempt (or first few attempts) don’t turn out quite as you’d hoped.
Wash your shirt (or shirts) prior to beginning this project. Doing so will pre-shrink it and prevent pulling on the edges of your design after you wash it. Make sure you try your shirt on again after pre-washing just to ensure that it still fits properly.
Printing T-Shirts Using Iron-On Transfer Paper
When creating your own t-shirts, using iron-on transfer paper is the easiest option. It doesn’t require a lot of special tools, and the process is easy enough even for little ones to enjoy. Iron-on transfer paper can be used to put photographs, graphics, lettering and just about any other type of design you can think of on a t-shirt.
Supplies
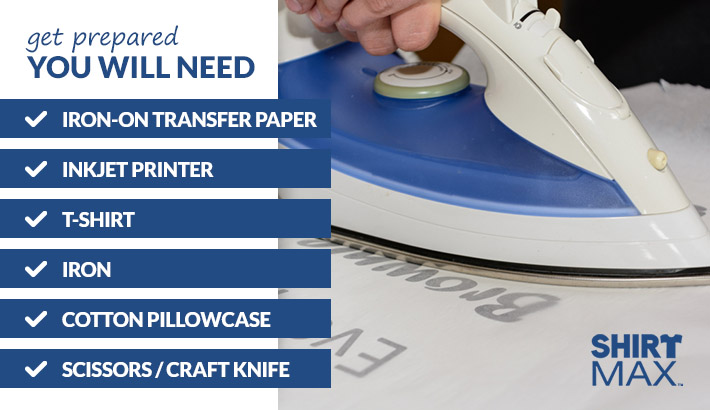
For this project, you will need iron-on transfer paper, an inkjet printer, a t-shirt, an iron, a cotton pillowcase and scissors or a craft knife. Transfer paper can be found at office supply stores, craft stores or online. It comes in two different varieties: one that’s suitable for white or light-colored tees and one that’s made for transferring images onto darker fabric. Pay close attention when shopping to ensure you purchase the one you need.
Choose an Image
Any image that is saved on your computer can be printed on transfer paper and applied to a shirt. Keep in mind, though, that quality matters. If you try to enlarge a small image to make it the appropriate size for a tee, it will likely become distorted. To ensure that your finished shirt looks amazing, you need a large, high-resolution image. Consider printing the image at the desired size on regular printer paper to see what it looks like before printing on transfer paper.
Once you have decided on an image to use, it’s time to print. Before you click the “Print” button, though, you may need to do an extra step. If you are printing on a light-colored shirt, you will need to mirror the image prior to printing. This is because light transfer paper creates a mirror image on the shirt. In other words, you need to print the design backward in order for it to be the right direction on your shirt. Look for a “mirror” or “reverse” setting in your print options window. If you can’t find it, open your design in an image editing program and flip it.
If you are using transfer paper for dark shirts, don’t flip the image. Dark transfer paper transfers the image to the fabric exactly as it appears.
When you’re ready, load the transfer paper into your printer, making sure it is facing the right direction. Check the product packaging for detailed instructions on how to print on the right side. Choose a high print quality setting to ensure that the finished image looks great. Click print and wait for your transfer to pop out.
Prep Your Transfer and Shirt
When your transfer is done printing, wait a few seconds for the ink to dry. Then, carefully cut out the image. Keep in mind that any paper you leave around the design will show up on your shirt as a thin film and detract from the quality. To avoid this, cut the transfer out as neatly as possible. If the design has complex edges, you may need to use a craft knife to ensure clean lines. Cutting out the image is the most challenging and time-consuming part of the project, but it’s worth taking the time to do it right!
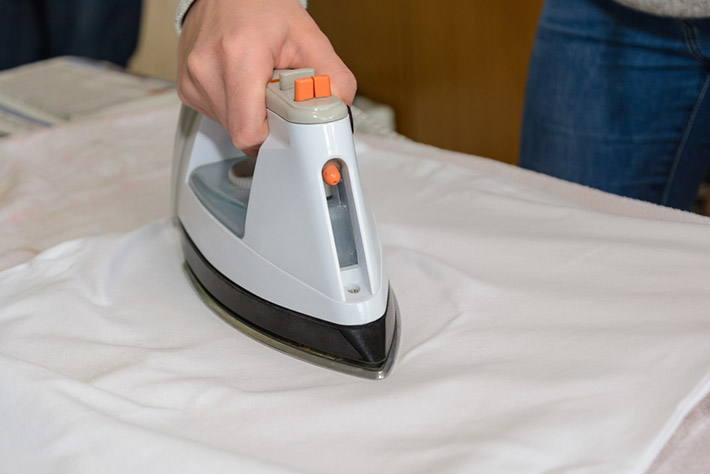
Next, lay a cotton pillowcase over a clean, hard surface, such as a table or countertop. Make sure the surface you choose can withstand heat! Generally, an ironing board is not the best option for the project. Plug your iron in and set it according to the instructions that came with your transfer paper. If the instructions do not specify which setting to choose, use the high-temperature or “cotton” setting. Do not use steam.
While the iron is heating up, spread your t-shirt over the pillowcase, making sure that the pillowcase is underneath the entire area where the design will be placed. Once the iron is hot, iron the shirt until it is completely smooth. If there are any wrinkles, they will show up in the transferred image.
Iron on Your Design
Now it’s time for the magic to happen! If you are using transfer paper for light-colored shirts, place the image face down on your shirt. If you’re using transfer paper for dark-colored shirts, place it face up. Carefully align the center of your design with the center of the t-shirt’s neckline. Adjust the vertical alignment as needed until your design is where you would like it to be on the finished shirt. It may be helpful to use a printed shirt you already own as a reference for determining where the image should be located. There are also image placement guides for t-shirts that are worth checking out.
Once you’re satisfied with the placement, start ironing the image onto the shirt. Apply firm pressure over the entire image, and keep moving the iron to ensure even heating and prevent scorching. Gently working in a circular motion from the center of the image outward typically works best. You may need to apply heat for anywhere from 30 seconds to several minutes. Check the transfer paper’s instructions to find out exactly how long it should take for the design to transfer.
Remove the Paper
Allow the area to cool for at least a few minutes. Then, carefully peel away the paper. It works best to start in a corner and peel away slowly. If the image seems to be stuck to the paper, iron again.
Once the paper comes off neatly, your shirt is finished and you can start wearing it right away.
Washing Shirts with Iron-On Designs
When it’s time to wash your new shirt, you need to take the appropriate steps to avoid damage. First, turn the shirt inside out prior to laundering. This helps protect the design. Wash the shirt using the delicate or gentle cycle and be sure to use cold water. Wash your customized tee by itself or with other delicate items. Do not wash with jeans or other heavy items as they could damage the design.
Remove your shirt from the washer as soon as the final cycle is complete. Lay flat or hang to air dry. Garments featuring iron-on transfers should not be placed in the dryer as the heat can damage the image. If you absolutely need to dry your shirt in a dryer, use the no-heat setting to avoid damage.
Other Creative Options
Following the steps listed above will yield a quality, custom-printed shirt. There are still plenty of things you can do, though, to let your creativity shine even further! If you aren’t happy with the edges around your printed image, consider going over them with puffy paint. Doing so will smooth out the edge and give your design some extra protection. You could even hand embroider around the edge of the transfer to make it look a bit less like an ironed-on design.
Keep in mind, too, that adult and kids t-shirts aren’t the only garments that can be customized using this method. Iron-on transfers also work great when you want to customize plain hoodies or a crewneck sweatshirt. You can even use transfers to place your own images and designs on tote bags, hats, blankets, sweatpants and just about any other type of fabric item you can think of!
If you are using transfers for light-colored shirts but would like to create a finished shirt that isn’t white or pastel, consider tie-dyeing it after you’ve applied the image. You could even dye the shirt with various food products for an all-natural, unique and totally amazing finish. If you choose to dye your white or pastel shirt after applying an iron-on transfer, just be careful to not damage your design.

Conclusion
A plain t-shirt is a perfect blank canvas for expressing your creativity. And with iron-on transfers, printing your own t-shirts is a piece of cake. The process is simple, and though cutting out the design can be a bit tedious, it’s enjoyable for people of all ages. Whether you are trying to come up with the perfect way to show off your artwork, needing to create custom shirts for members of your staff, team or organization or are looking for a fun project to do with your kids, using iron-on transfers is a great option!
At ShirtMax, we have the blank t-shirts you need for any project. And when you choose us, you can get the apparel you need at a fraction of its regular retail price. Shop now to discover our full selection of blank apparel for men, women and kids!


