When it comes to creating the perfect back-to-school wardrobe, the options are limitless. And if you have an aspiring fashionista in your home, there is nothing better than helping your child design her own wardrobe. The best part? Creating back-to-school looks doesn’t have to break the bank. Blank t shirts are extremely economical, and they provide the perfect foundation for a wide variety of looks.
From classic crafts like tie-dying to more in-depth projects like converting a plain t shirt into a fashionable top, there are options for every skill level and fashion sense. Here are some of our favorite creative DIY back-to-school looks using blank t shirts.

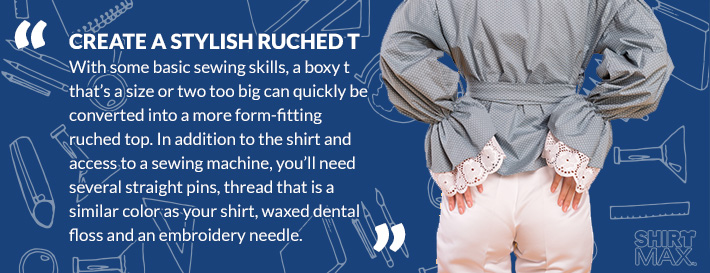
Turn a Plain Boxy T into a Stylish Ruched T
With some basic sewing skills, a boxy t that’s a size or two too big can quickly be converted into a more form-fitting ruched top. In addition to the shirt and access to a sewing machine, you’ll need several straight pins, thread that is a similar color as your shirt, waxed dental floss and an embroidery needle. Start by cutting off the shirt’s sleeves and the seams that attach them to the rest of the shirt. Turn it inside out and try it on. Either stand in front of a mirror or have someone help you insert pins along your curves to make the shirt more form-fitting.
Carefully remove the shirt, and rearrange the pins to make sure nothing is lumpy or puckered. Sew along the pins, and then try the shirt on right-side out. Make adjustments as needed. When you’re happy with the overall shape of your shirt, cut off the excess material, but leave a bit of seam allowance. Decide where you would like the ruching to stop, and place a pin there. Next, cut a piece of dental floss that’s about two or three times the length of the section you want to ruche. Zig-zag stitch over the floss on the extra seam allowance. Don’t stitch directly into the floss. It needs to be able to move.
Pull on the top end of the floss, gathering the fabric as you go. When you’re finished, use your embroidery needle to tack down the floss. Even out the gathers, and tack those down as well. Repeat on the other side. That’s it! You now have a stylish ruched t instead of that boxy, oversized shirt.
Stencil a Design Using Bleach
If you are looking for an easy way to completely transform a dark-colored shirt, this is it! All you need is a t shirt, bleach, water, a spray bottle, gloves, a paintbrush and a stencil. You can use just about any color plain t, but darker colors work best. You can purchase a stencil for your design, or you can cut one out yourself. Lay your shirt out flat, and position the stencil wherever you would like. Make sure there are no wrinkles. Mix two parts bleach to one part water in a spray bottle. Wearing gloves, carefully spray over your design. Be sure to saturate well around the edges to ensure that your design comes out crisp.
Let it sit for five to 15 minutes to see how well the color is changing. Add more bleach as needed. When you’re happy with how it works, remove your stencil and wash the shirt immediately. With this project, the only limit is your creativity. You can do simple designs, complex designs or even add text to your shirt. If you have a vinyl cutter, cutting out your stencil is even easier. Let your imagination run wild, and you can quickly make a plain t shirt look like a top that cost a fortune at a boutique.
Make a Shirt That Looks Like a Doodled Notebook Page
This project is perfect for young kids, and it’s super easy! All you need is a blank shirt (white works best), fabric markets, and a ruler or yardstick. Grab a blue fabric marker, and start by drawing horizontal lines across the shirt to resemble a notebook page. Use your ruler or yardstick to keep them straight and evenly spaced. Draw a red vertical line down the left side of the shirt, again using your ruler/yardstick to keep it straight.
Your part is done! Turn the shirt over to your child and let him or her doodle away. It works best to create drawings using black fabric markers, and then fill them in using a variety of colors. What better way for your aspiring artist to showcase their talents? Use a permanent fabric marker like Tulip Dual-Tip Fabric Markers for the lines to ensure that they stand up to washing. For the doodles, your child can either use permanent fabric markers or washable ones. If you go with washable markers, your child will have a fresh canvas to decorate every time you wash the shirt. How awesome is that?
Add Some Bling
When you want to spruce up a plain t but adding a design or doing major restyling isn’t quite what you had in mind, try adding a bit of bling. Stitching a few pearls or decorative beads around the neckline instantly takes any t shirt to the next level. Rivets and studs are also great additions that make a big impression without requiring a lot of work. If you really want to add some sparkle, try glitter. Mix it up with fabric paint, and create your own unique designs. You can make your design as simple or as complex as you would like, and since you’re using paint, you can use glitter to add some sparkle to a shirt of any color.
Turn a Tee Into a Skirt
A t shirt doesn’t have to stay a t shirt. In fact, with a few (very) basic sewing skills, you can turn one into a fashionable skirt. You’ll need a t shirt with a circumference that is approximately one-third larger than your waste, a sewing machine, a 3-inch-wide elastic band, fabric scissors, a straight edge and a fabric pencil. Start by laying your shirt out flat and making sure the bottom edges are lined up. Smooth it out, and then draw a straight line horizontally just below the armpits using your fabric pencil. Cut across the line using your fabric scissors.
Sew a gathering stitch (a long straight stitch without much tension) ¼ inch from the top of the piece you just cut. Leave long thread tails, and then sew again ¼ inch below the line you just stitched. Wrap the elastic band around your waist and mark where it feels snug but not overly tight. Place a mark 1 ¼ inch past that to account for a 5/8-inch seam allowance on both sides. Align the ends together and sew. Then sew again ¼ inch away from the first stitch. Use a zig-zag stitch to finish the raw edges.
With the right side of your skirt facing up, position the lower edge of the waistband 5/8 inch past the skirt’s upper edge. Pin in place. Pull the lower thread tails to gather the skirt until it reaches the same circumference as the waistband. Pin. Turn the skirt wrong-side out, and zig-zag stitch over your gathering stitch through the skirt and the waistband. Turn your skirt right-side out, put it on, and you are ready to go!
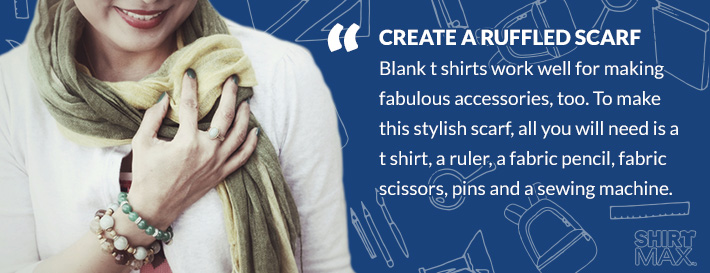
Make an Awesome Ruffled Scarf
Blank t shirts work well for making fabulous accessories, too. To make this stylish scarf, all you will need is a t shirt, a ruler, a fabric pencil, fabric scissors, pins and a sewing machine. Get started by laying the shirt out flat and measuring up about 8 to 10 inches from the bottom. Mark and cut across horizontally. Cut the bottom seam off, too. This should leave you with a long tube.
Cut that tube in half horizontally to create two tubes. Then, cut one side of each to create two long, skinny t shirt strips. Align the strips with right sides together, and then sew the short sides on one end together to make a single long fabric strip.
Adjust the tension and stitch length on your sewing machine. You want long stitches with very little tension. Fold one end of your long strip of fabric into thirds, and insert a pin where each fold is located. Begin sewing at one pin, and stitch the entire length of the fabric. Repeat where the other pin was placed.
You should now have a long, ruffled strip of material, but we aren’t quite finished yet. Use the basting stitch to sew over both seams. This creates extra ruffles. Adjust your sewing machine settings back to normal and go back over your basting stitches. Finally, remove the basting stitches, and you will be left with a fabulously ruffled scarf that will go perfectly with your favorite jacket.
Conclusion
With a little bit of creativity, you can turn any blank t shirt into a piece of stylish apparel that any child or teen would be proud to rock when heading back to school. Whether you add a bit of paint or some embellishments to turn a boring shirt into a stunning masterpiece, or you completely repurpose a t shirt to create something entirely new, there are options for every taste and skill level.
Because blank t shirts are extremely affordable and come in a huge variety of colors and styles, it’s easy to create an amazing back-to-school wardrobe for any student, regardless of your budget.


